This week was a bit
uneventful. On Tuesday, the only class we held this week, it was raining so we
held class in the lab for two and a half hours. We had brought back material
from the field prior to Tuesday, so we checked the trays that had already been
presorted and organized by material, such as iron, pottery, glass, etc. Now, we
archaeologists talk about sorting as second nature to us, but many people might
not understand what sorting or lab days in general entail. In this blog post, I
will explain sorting and other things that happen in the lab.
At the site, any soil,
rocks, or artifacts left in the screen are placed in a bag. On the bag is the
provenience information identifying where at the site the material came from,
including the particular excavation square, feature, and Field Specimen (F.S.)
number (see previous blog posts for explanation of an F.S. number), plus the
initials of the excavators and the date that it was excavated and screened. These
bags are then brought back to what is called the “Dirty Lab” and washed. The
way we wash these bags is we get a medium size plastic basin and we fill it up
with water. Inside that plastic basin we place a colander to catch artifacts
that might get lost at the bottom of the buddy basin. Inside the colander is
where the matrix from the bag goes. It generally loses a good bit of dirt when
placed in the water. We gently clean the items inside the colander by either
rubbing our hands over the stuff inside, or we use a toothbrush. 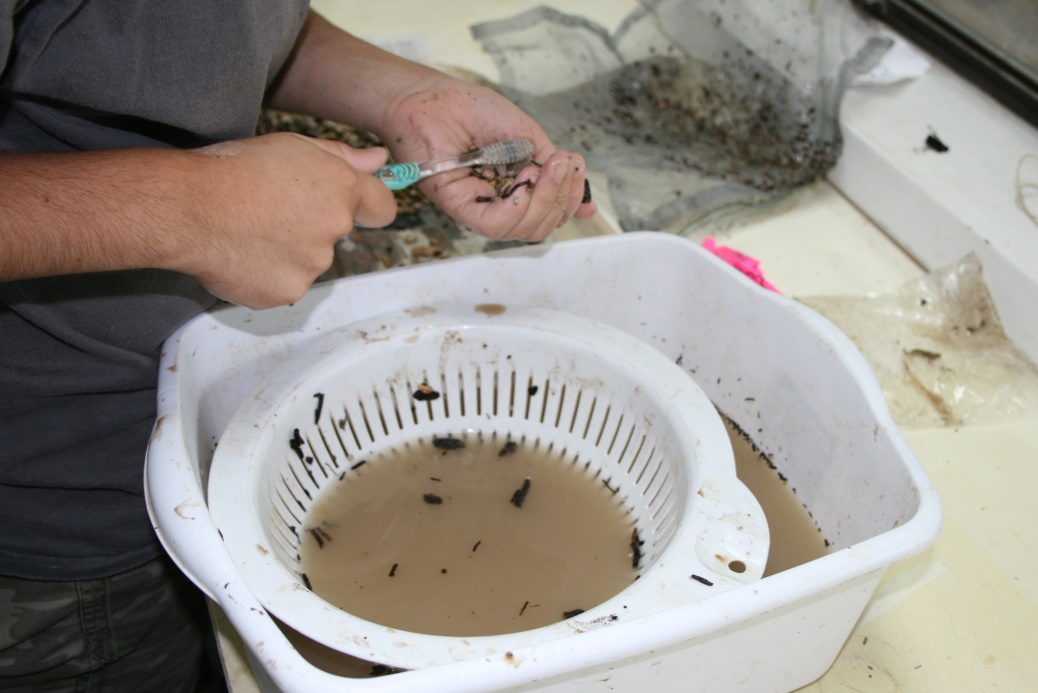 If the water
gets too dirty then we pour it down the sink. Dirt is captured in a silt trap
installed beneath the sink, so the pipes don’t get clogged. Inside the sink is
a piece of window screen to catch anything small that might have fallen through.
After all the material has been cleaned, we line old cafeteria trays with
newspaper and we spread out all of the wet material on the tray to dry. It then
dries for roughly 24 hours. After it is dried, the sorting process begins.
If the water
gets too dirty then we pour it down the sink. Dirt is captured in a silt trap
installed beneath the sink, so the pipes don’t get clogged. Inside the sink is
a piece of window screen to catch anything small that might have fallen through.
After all the material has been cleaned, we line old cafeteria trays with
newspaper and we spread out all of the wet material on the tray to dry. It then
dries for roughly 24 hours. After it is dried, the sorting process begins.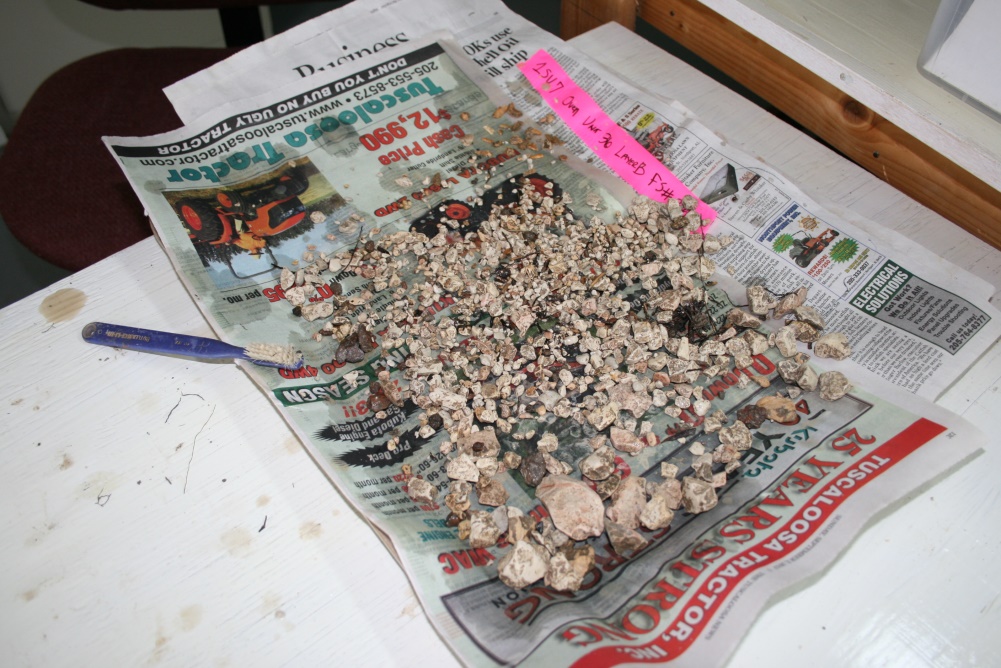
I have been made fun of
multiple times by my friends, because when sorting, it appears as though we are
only looking at rocks. At Fort Tombecbe, chalk rubble is what most of the
matrix consists of after washing, but there are often miniscule artifacts within
the chalk rubble, which is why we have to go through it very carefully. For
example, the glass beads that were used for trade between the colonialists and
the Indians are often smaller than your fingernail. 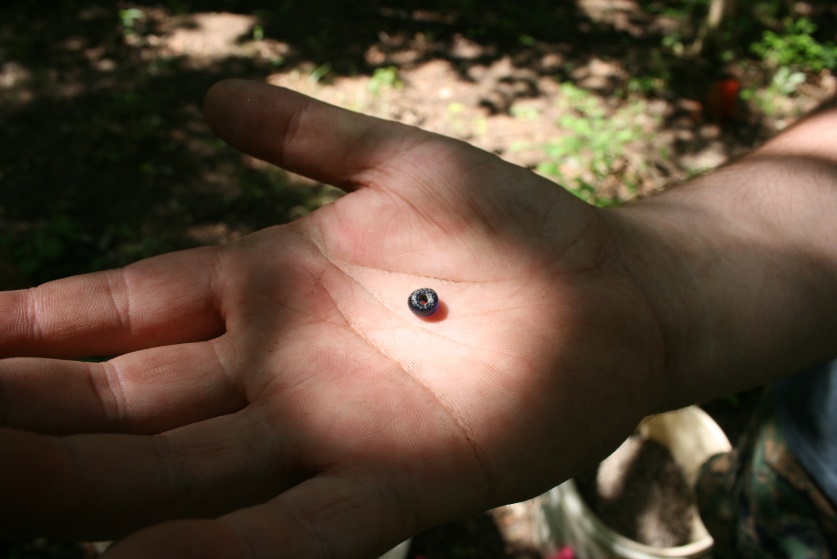 When you find an artifact
while sorting, you remove it from the rest of the matrix and place it into
different categories based on what the artifact is. It is generally more
expedient to have little Styrofoam trays to place them onto. These categories
are used so that it is easier to find and understand how much of each item is
in the area. This can be interpreted in later research to determine what these
people were doing, how they were doing it, and how well off they were. Some
examples of categories that we use in the lab include iron, brick, daub, bone,
charcoal, Indian ceramic, European ceramic, lead shot, gun flint, glass, beads,
and UID which stands for unidentified. UID is for when we don’t know what
something is and it needs to be identified later. These categories are
essential in the processing or recovery of artifacts.
When you find an artifact
while sorting, you remove it from the rest of the matrix and place it into
different categories based on what the artifact is. It is generally more
expedient to have little Styrofoam trays to place them onto. These categories
are used so that it is easier to find and understand how much of each item is
in the area. This can be interpreted in later research to determine what these
people were doing, how they were doing it, and how well off they were. Some
examples of categories that we use in the lab include iron, brick, daub, bone,
charcoal, Indian ceramic, European ceramic, lead shot, gun flint, glass, beads,
and UID which stands for unidentified. UID is for when we don’t know what
something is and it needs to be identified later. These categories are
essential in the processing or recovery of artifacts.
After everything is
separated into categories, we place them in bags according to their category
and put all relevant information on them, which includes the site number, FS
number, layer of the unit, the date it was dug, the digger’s initials, and
finally what it is. Then we place the flagging tape which has all of that
information inside the larger bag that all the little bags go in. It is
important to maintain all of that information so context will not be lost. By
placing the information in three different places it is harder to lose the
extremely valuable information.